7.1.5. Translations
NexLog DX-Series supports using MediaWorks DX in multiple languages via user-configurable translations. The translations are user-customizable and presented in a list of text “strings” that you can edit for clarity.
7.1.5.1. Translations Basics:
You can view, edit and upload Translation files stored on the recorder in Configuration Manager via the System: Translations page.
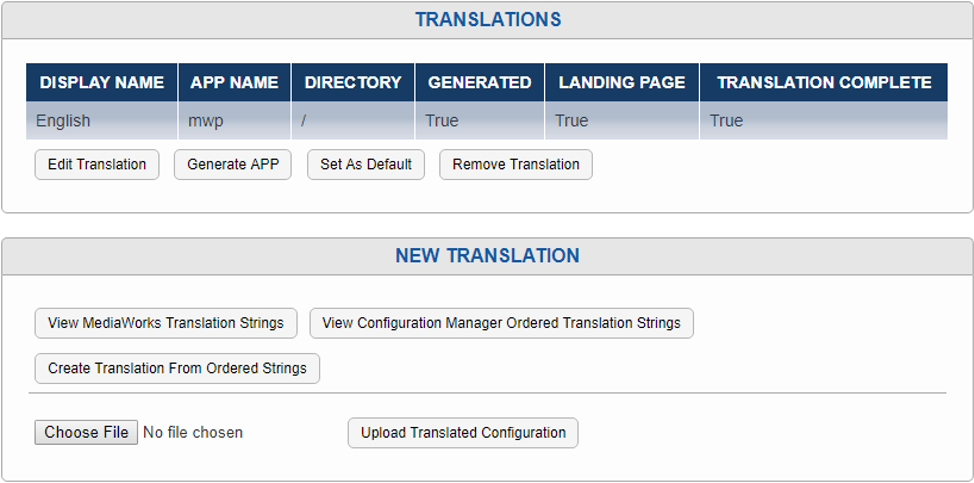
Fig. 7.9 Translations
At the top is a list of currently loaded Translation files, with important information displayed in a column view. Note that a full translation requires a pair of files, one for MediaWorks DX and one for elements of MediaWorks DX that draw on elements from Configuration Manager, such as Evaluations and Alerts. These are distinguished by App Name: mwp for MediaWorks DX or webconfig for Configuration Manager.
The Display Name must be unique for each Translation, we recommend (Name of Language) (Name of APP) to keep things clear. For example, for French, we suggest having the display names be Française MWP and Française WC.
On the other hand, the Directory must be the same for each half of a translation. So, in this case, both Française MWP and Française WC should have a directory of “fr”.

Fig. 7.10 Translations Configured
Set as Default changes which language the Welcome page will use as the main link to MediaWorks DX. By default, this is English, and other language choices will appear below the MediaWorks DX icon, listed by Display Name. On a system configured as above, however, the icon would link to the http://*your recorder-IP address here*/client/fr/mediaworks/ address, leading to the French translation.
Generate App will be covered in the next section, as it makes more sense in context.
7.1.5.2. Creating A Translation:
To create a new translation, start by clicking the View MediaWorks Translation Strings button. A string can be a word, a number, a sentence, and these strings make up all the text directly visible in the MediaWorks DX client. Text that appears in alerts, quality factor and archiving is optional to translate and is covered in the Configuration Manager Translation Strings, which will be next.

Fig. 7.11 New Translations
Once you’ve clicked View MediaWorks Translation Strings button, use the Select All button to select all the strings, then copy the selection and paste into a text file or word document. You can then translate each line manually, or, as we recommend, pass the lines through a machine translation service like Google Translate, to provide a first draft of a new translation and then refine the translation manually.
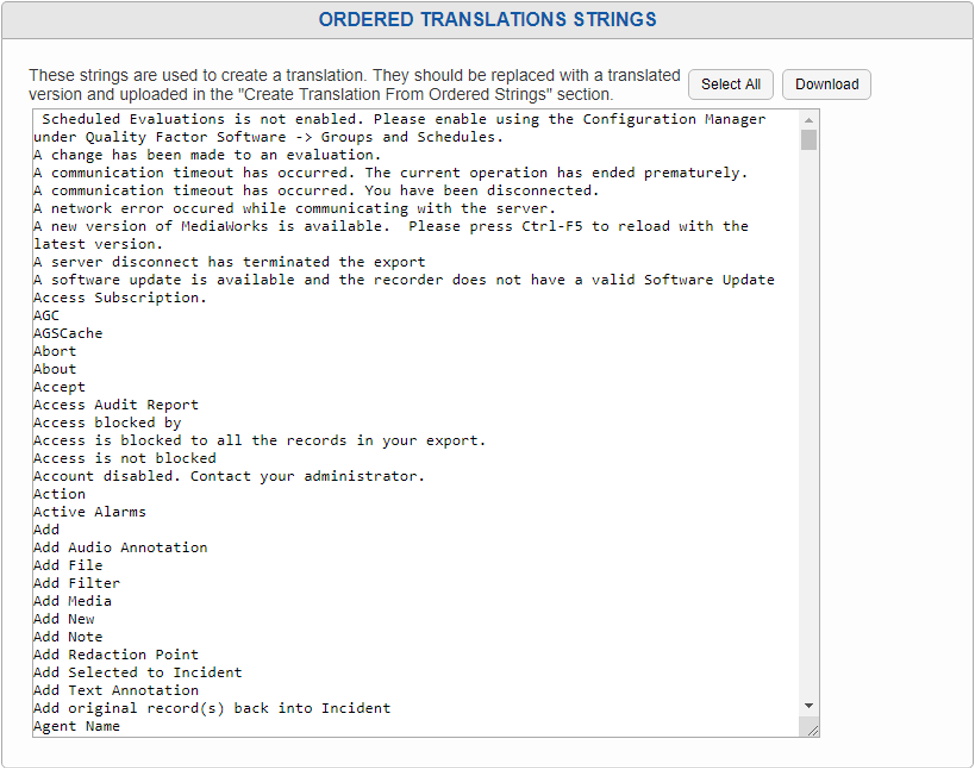
Fig. 7.12 Ordered Translations Strings Page
IMPORTANT NOTE: The translation created via Google will likely have amusing or embarrassing mistakes in it, for example, going from English to French it will change “Channel Name” into “Nom du canal” (“Name of Canal”), and from English to Russian it will want to “Rescue” your incidents rather than “Save” them. So, it is essential that a native speaker of the language-being-translated-to proofread the result to avoid obvious mistakes or confusing word choices made by the context-less machine translation.
ALSO IMPORTANT: The strings must be kept one to a line, in the exact order presented here, or the translation will not work correctly. Lines out of order will cause text to show up in the wrong places in the translation, or make the translation to not work at all.
Once you are ready to build a translation out of one set of strings, click the Create Translation From Ordered Strings button. This will bring up a page with a large text field pre-populated with this text:
[SETTINGS]
TRANSLATION\_DISPLAY\_NAME=<display name>
TRANSLATION\_OUTPUT\_DIRECTORY=<app path>
TRANSLATION\_APP=mwp
TRANSLATION\_DO\_DYNAMIC=1
TRANSLATION\_DISPLAY\_R\_TO\_L=0
[TRANSLATIONS]
Paste your translated lines beneath the [TRANSLATIONS] line, then scroll back up to the top of the field to fill in the settings:
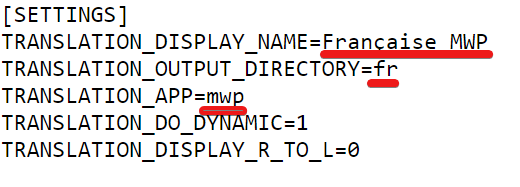
Fig. 7.13 Translation Settings
The Display_Name must be unique for each Translation, we recommend (Name of Language) (Name of APP) to keep things clear. For example, for French, we suggest having the display names be Française MWP and Française WC. On the other hand, the Output_Directory must be the same for each half of a translation. So, in this case, both Française MWP and Française WC should have a directory of “fr”.
The Translation_APP is either MWP, for the MediaWorks DX Strings or WebConfig, for the Configuration Manager Strings. Anything else will fail to load.
Translation_Do_Dynamic should be left as 1 if you want any custom field names to be translated; they will show up at the end of the app for editing once this is saved.
Translation_Display_R_To_L should be set to 1 if the target language reads right to left. Note this only changes the direction the text is written in; it does not flip the whole UI of MediaWorks DX.
Once this is all configured, scroll down and click Save.
If successful, the Translations page will load again with a message saying: “Translation uploaded. Select “Generate APP” to enable the translation.” Click the Generate App button to create a custom version of MediaWorks DX at the directory configured in the Translation settings.
The Generate App step is not required for Configuration Manager translations, but a MWP translation pointing to the same directory is required to make any use of it.
After making the MWP translation, one can translate Alerts, Quality Factor and Archiving windows shown in MediaWorks DX by making a Configuration Manager Translation. Start by clicking the View Configuration Manager Ordered Translation Strings button and repeat the above steps, with one major difference: Alert strings contain variables such as <~1~> and <~112~>, which must remain whole during this process. These variables substitute in text like the name of the recorder, the serial number of the recorder, error messages from the database, status messages passed along from third-party hardware installed in the system, etc.
Three things to note about the variables:
They must remain exactly as typed: <~1~> is good, but <~ 1 ~> is not. Translations by Google for some languages will modify the strings, and by using Find & Replace in Microsoft Word or other text editors, one can change all instances of <~ 1 ~> in the machine translation back to the required <~1~>. This must be repeated for <~110~>, <~111~>, etc, that you find throughout the list. Malformed variables will show up as plain text in the alerts.
The variables can be rearranged to better fit the grammar of the language. Missing variables are ignored. Extra variables are also ignored.
Because it is impossible to offer every possible string these variables can stand for, they are not translated and fall back to what they are by default in the English translation. In most cases, the variables will be easily understood numbers like software version or serial number; in other cases they will be highly specialized database strings that can will be useful when reported to dealers or Eventide Service when reporting a problem.
7.1.5.3. Editing an Existing Translation:
A translation may need a second draft; a word might feel awkward in context, or a phrase may be too long for the space available. Or perhaps an existing translation file is available, but your site wants to customize some of the terminology used. For these reasons and more we provide the option to edit existing translations.
To begin, select the file from the list and click the Edit Translation button. This will open the Edit Configuration File page for this language. You can edit the text here, or you can select all, copy, and paste into a separate text editor to make your changes, then copy and paste the entire list back into this page and save. If the file changed is a MediaWorks DX translation, select the translation and click Generate APP to update it to the latest text.
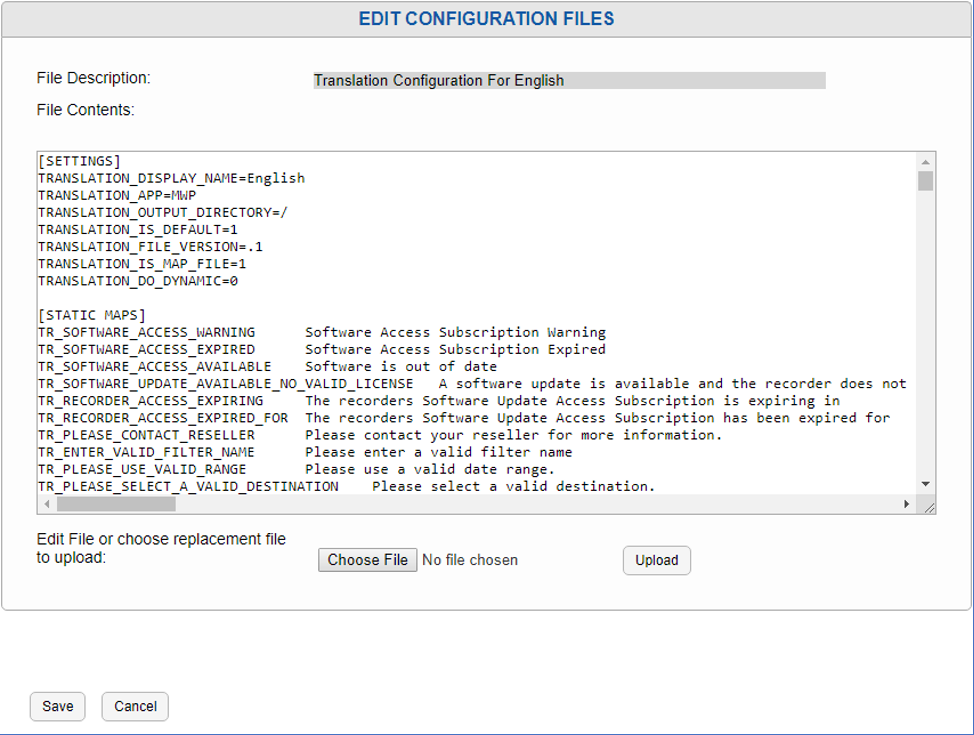
Fig. 7.14 Translations Edit Page
7.1.5.4. Upload Translated Configuration:
We recommend contacting Eventide Service to inquire about currently available translations, and then using the Upload Translated Configuration feature. To do so, choose the file with the Choose File button, then click Upload Translated Configuration. If the file chosen is a MediaWorks DX translation, once it is loaded, select the translation and click Generate APP, to make it available on the welcome page.