7.6.1. Users
The Users page allows the creation and maintenance of user accounts on the recorder. It displays a table showing each user currently configured on the system.
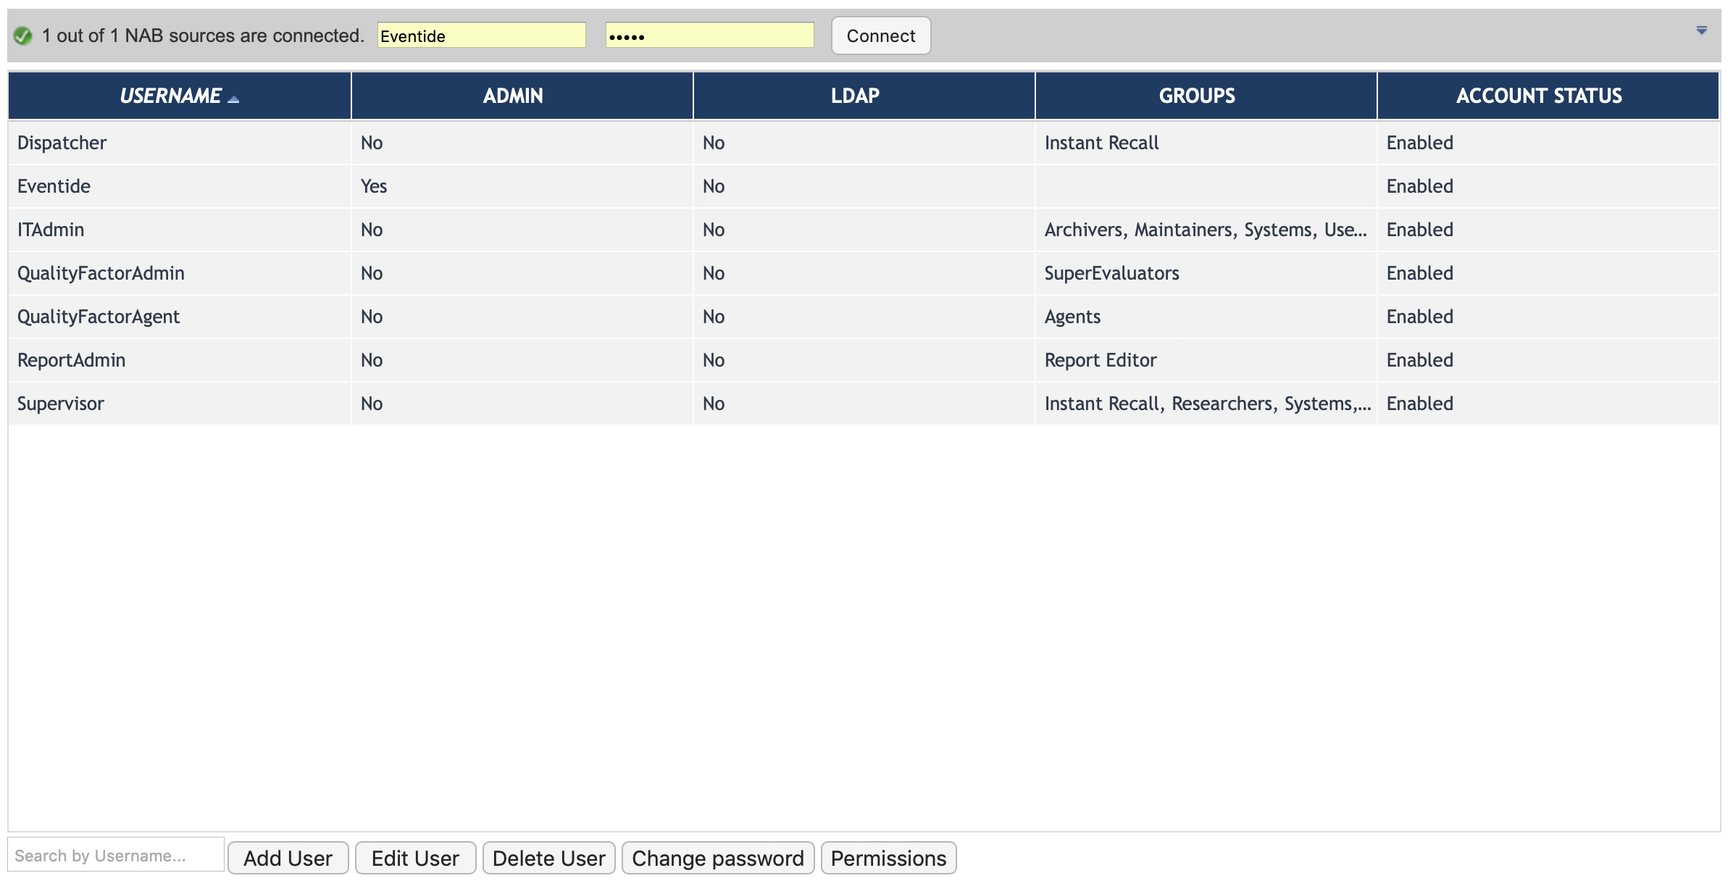
Fig. 7.100 User Configuration
This table can be sorted by clicking in the header on the column you want to sort by; the width of the columns is also adjustable. The columns shown are:
Username: The name the user will use to log into the system.
Admin: An indication of whether the user is an Administrator.
LDAP: An indication of whether the user is part of Active Directory LDAP server, or local to the recorder. If you have not configured Active Directory all users will display “No.”
Groups: A list of the user groups that this user is assigned to. If the user is a member of many groups only the first few will be displayed.
Below the main users table are several action buttons. All but the “Add User” button first require a user to be selected in the user table and they take effect on the selected User. The buttons are Add User, Edit User, Delete User, Change Password and Permissions. Delete User and Change Password can be applied to multiple users at once if you select more than one from the list with Shift+Click or Ctrl+Click.
The Search by Username… field is useful on systems with a lot of users; it will limit the displayed users to those containing the characters entered. For example, if you put “d” in the field in the figure above, it would show only DSigal and Eventide; if you put “b”, BBellerue & LBertucci.
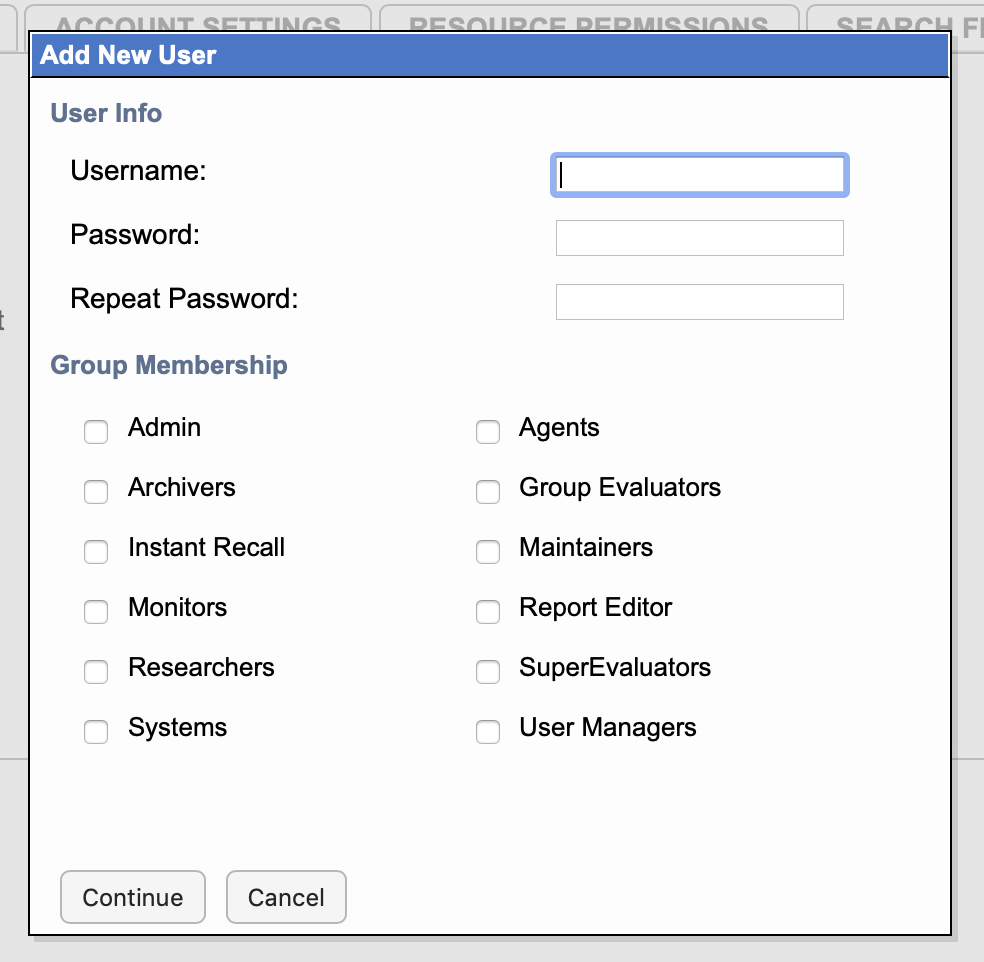
Fig. 7.101 Add New User Pop Up
7.6.1.1. Add User and Edit User
Add User will open a blank user to configure, starting with Add New User overlay that requires the entry of the most important information about a user account: Username, Password and Security Group.
Edit User brings up the same page, without the Add New User overlay, with the information and settings for the selected user. One difference between the ‘Add User’ page’ and ‘Edit User’ page, is that when adding a user, the ‘Username’ parameter is editable, whereas it cannot be changed when editing an existing user.
No options changed on any of these tabs will take effect until the ‘Save’ button at the bottom of the page is clicked, except for Resource Permissions and Search Filters which update in real time.
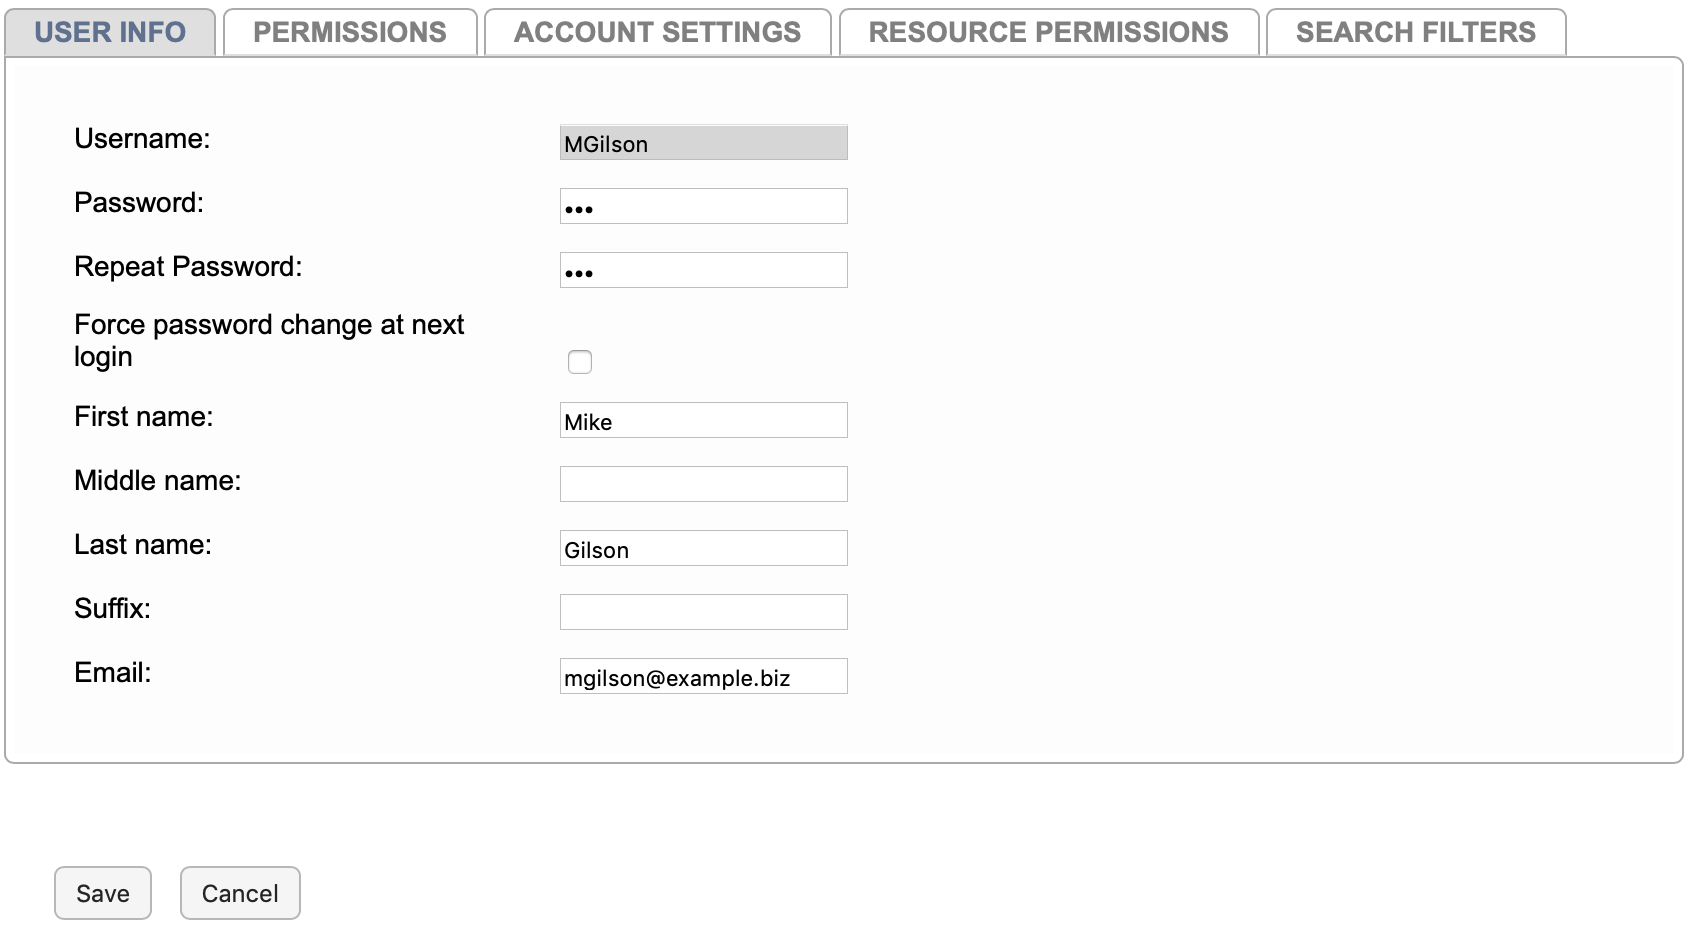
Fig. 7.102 Editing a User
The available parameters are described below:
7.6.1.1.1. User Info
Username: The name of the user being edited or added. The username of existing users cannot be changed. If you wish to change the name of a user, the user entry can be duplicated by right-clicking on the user and selecting Duplicate User, which will let you create a new user with the same settings.
Force password change at next login: If checked, the user will be forced to change their password the first time they log into the system. This can be used in conjunction with the Change Password option to allow someone to reset another user’s password if they have forgotten what they set it to.
First Name: The user’s first name
Middle Name: The user’s middle name
Last Name: The user’s last name
Suffix: The user’s full name suffix (e.g., Jr.) if any
Email: The address associated with this user account. The primary purpose of the email parameter is that Users with Administrator access are emailed copies of any recorder alerts that are configured to send email. A valid email address also allows users to communicate on evaluations in Quality Factor.
7.6.1.1.2. User Permissions
- Security
This control provides a check box for each user group configured for the system. By default, these groups are:
Admin
Agents
Archivers
Group Evaluators
Instant Recall
Maintainers
Monitors
Report Editor
Researchers
SuperEvaluators
Systems
Checking the box makes the user a member of that group, and the user will inherit all permissions which that group provides. Except for ‘Admin’ (which is a hard-coded internal group name providing Administrator access) all the user groups on the system and what permissions they entail can be edited using the System: User Groups and System: Permissions NexLog DX-Series Configuration Manager pages. Check a box to add the user to that group, or uncheck to remove the user from that group.
Table 7.1 Default Security Group Privileges at the Front Panel¶ Security Group
Privileges
Admin
All available privileges, including the ability to create new users, and receive emailed alerts.
Archiver
Ability to archive calls (INFO screen only).
Maintenance
Ability to change system settings (SETUP screen only).
Monitor
Ability to monitor live calls (INFO screen only).
Researcher
Browse and play back recorded calls (RECALL screen only).
Table 7.2 Default Security Group Privileges in NexLog DX-Series Clients¶ Security Group
Privileges
Admin
All available privileges, including the ability to create new users, and receive emailed alerts.
Archiver
No access.
Evaluator
Evaluations Tab. Usually paired with Researcher group.
SuperEvaluator
Evaluations Tab. Usually paired with Researcher group.
Maintenance
No access.
Monitor
Ability to monitor live calls (Channels tab only).
Researcher
Browse, play and export recorded calls (Browse, Search, Incidents, Live Monitor).
More information about User Groups can be found below in the User Groups and Permissions sections.
- Archive Drive Maintenance Access
This affects which drives a user can access at the front panel.
- ROD Channels
This field uses the same formatting as the Channel IDs parameter above and determines what if any channels the user will be allowed to perform “Record On Demand” on. If the user has permission, they will be able to temporarily disable recording on the channels they have this permission on.
- Instant Recall Replay Limit
On the Front Panel and the MediaWorks DX and MediaAgent DX clients, users have access to an Instant Recall functionality in which they can view the most recent calls on the recorder. Settings allow users can select which channels along with the amount of time they want to recall.
Note
Instant Recall user credentials can be used for Headless View in MediaWorks DX
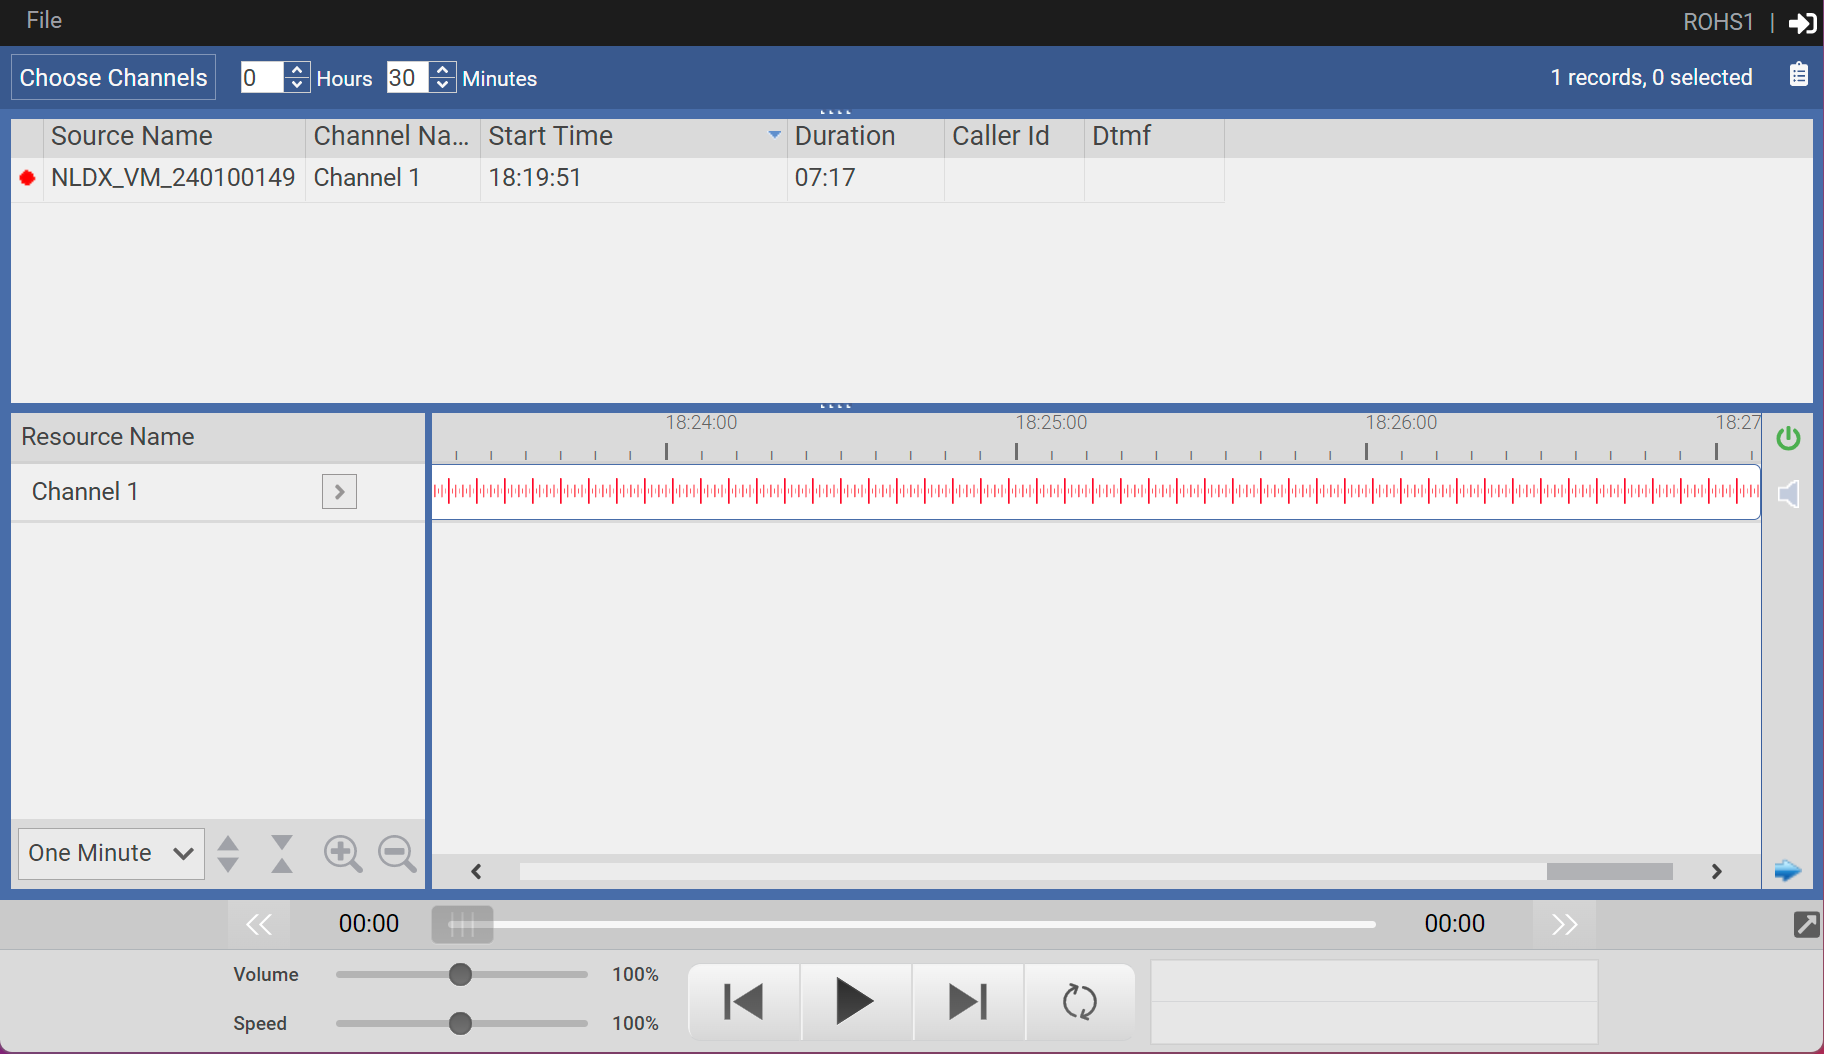
Fig. 7.103 Headless MediaWorks DX Display
- Restrict to user tagged recordings on Instant Recall tab
If this checkbox is selected, then when viewing the Instant Recall tab, users will only be able to view and play call records that have a metadata field called USER_ID which contains their username. For this setting to have any value, you must also create the USER_ID column in “Recording: Custom Fields” and provide USER_ID information to the field, either by manually placing User_IDs in individual calls using MediaWorks DX, by configuring the “Quality Factor: Agent Mapping” section for Call Taker tracking, using “Windows User Tracker”, or by a custom integration. This does not apply to other tabs of MWP.
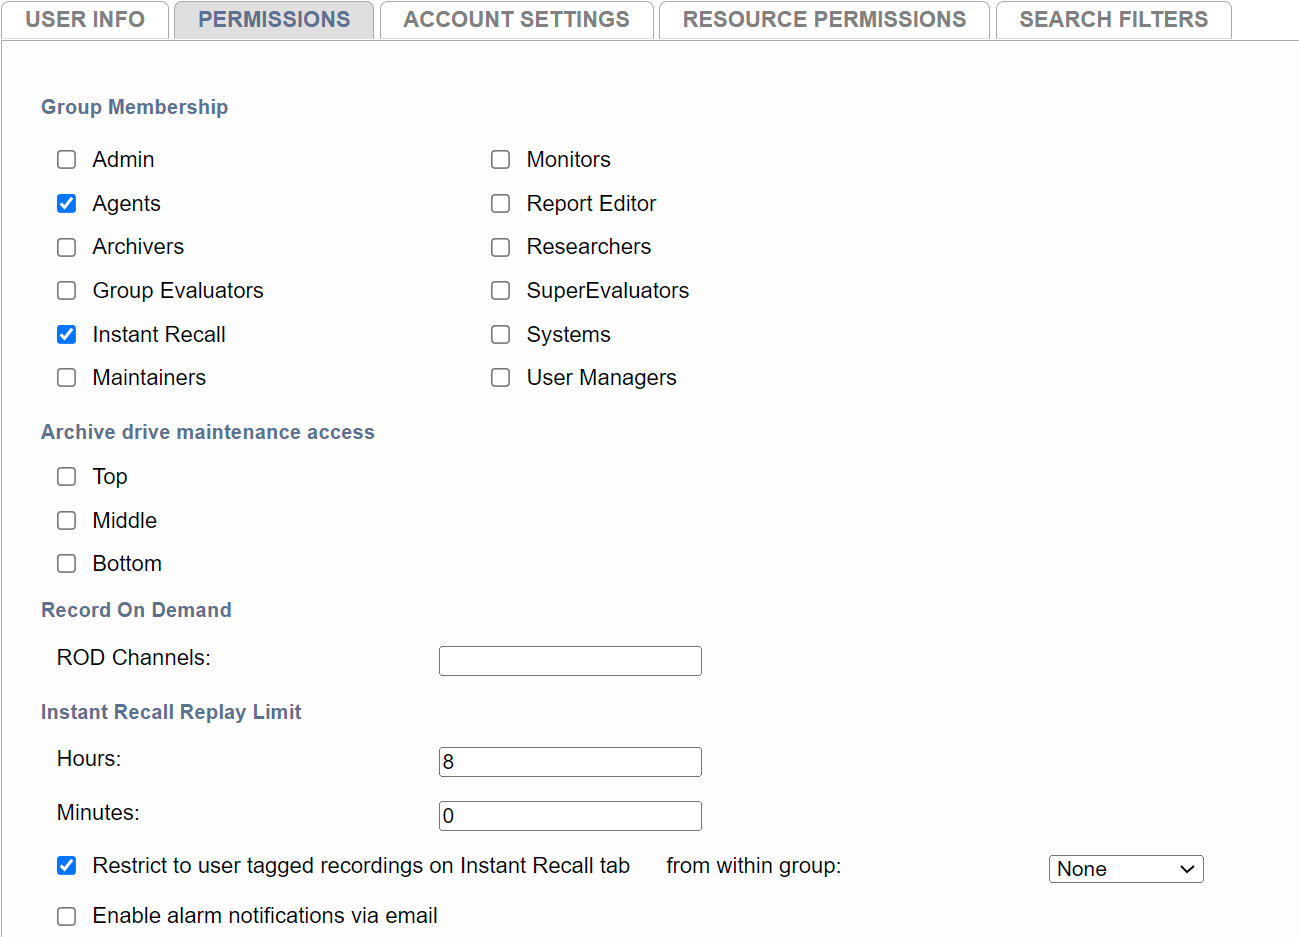
Fig. 7.104 Restrict to user tagged recordings

Fig. 7.105 MediaWorks Player Restrict to user tagged recordings
- From within Group
When enabled, the “From within Group” function will filter which channels are available to a user based on the resource group permissions applied.
Under “Recording -> Resource Groups” create a “New Group”, and select the channels to include in your filter.
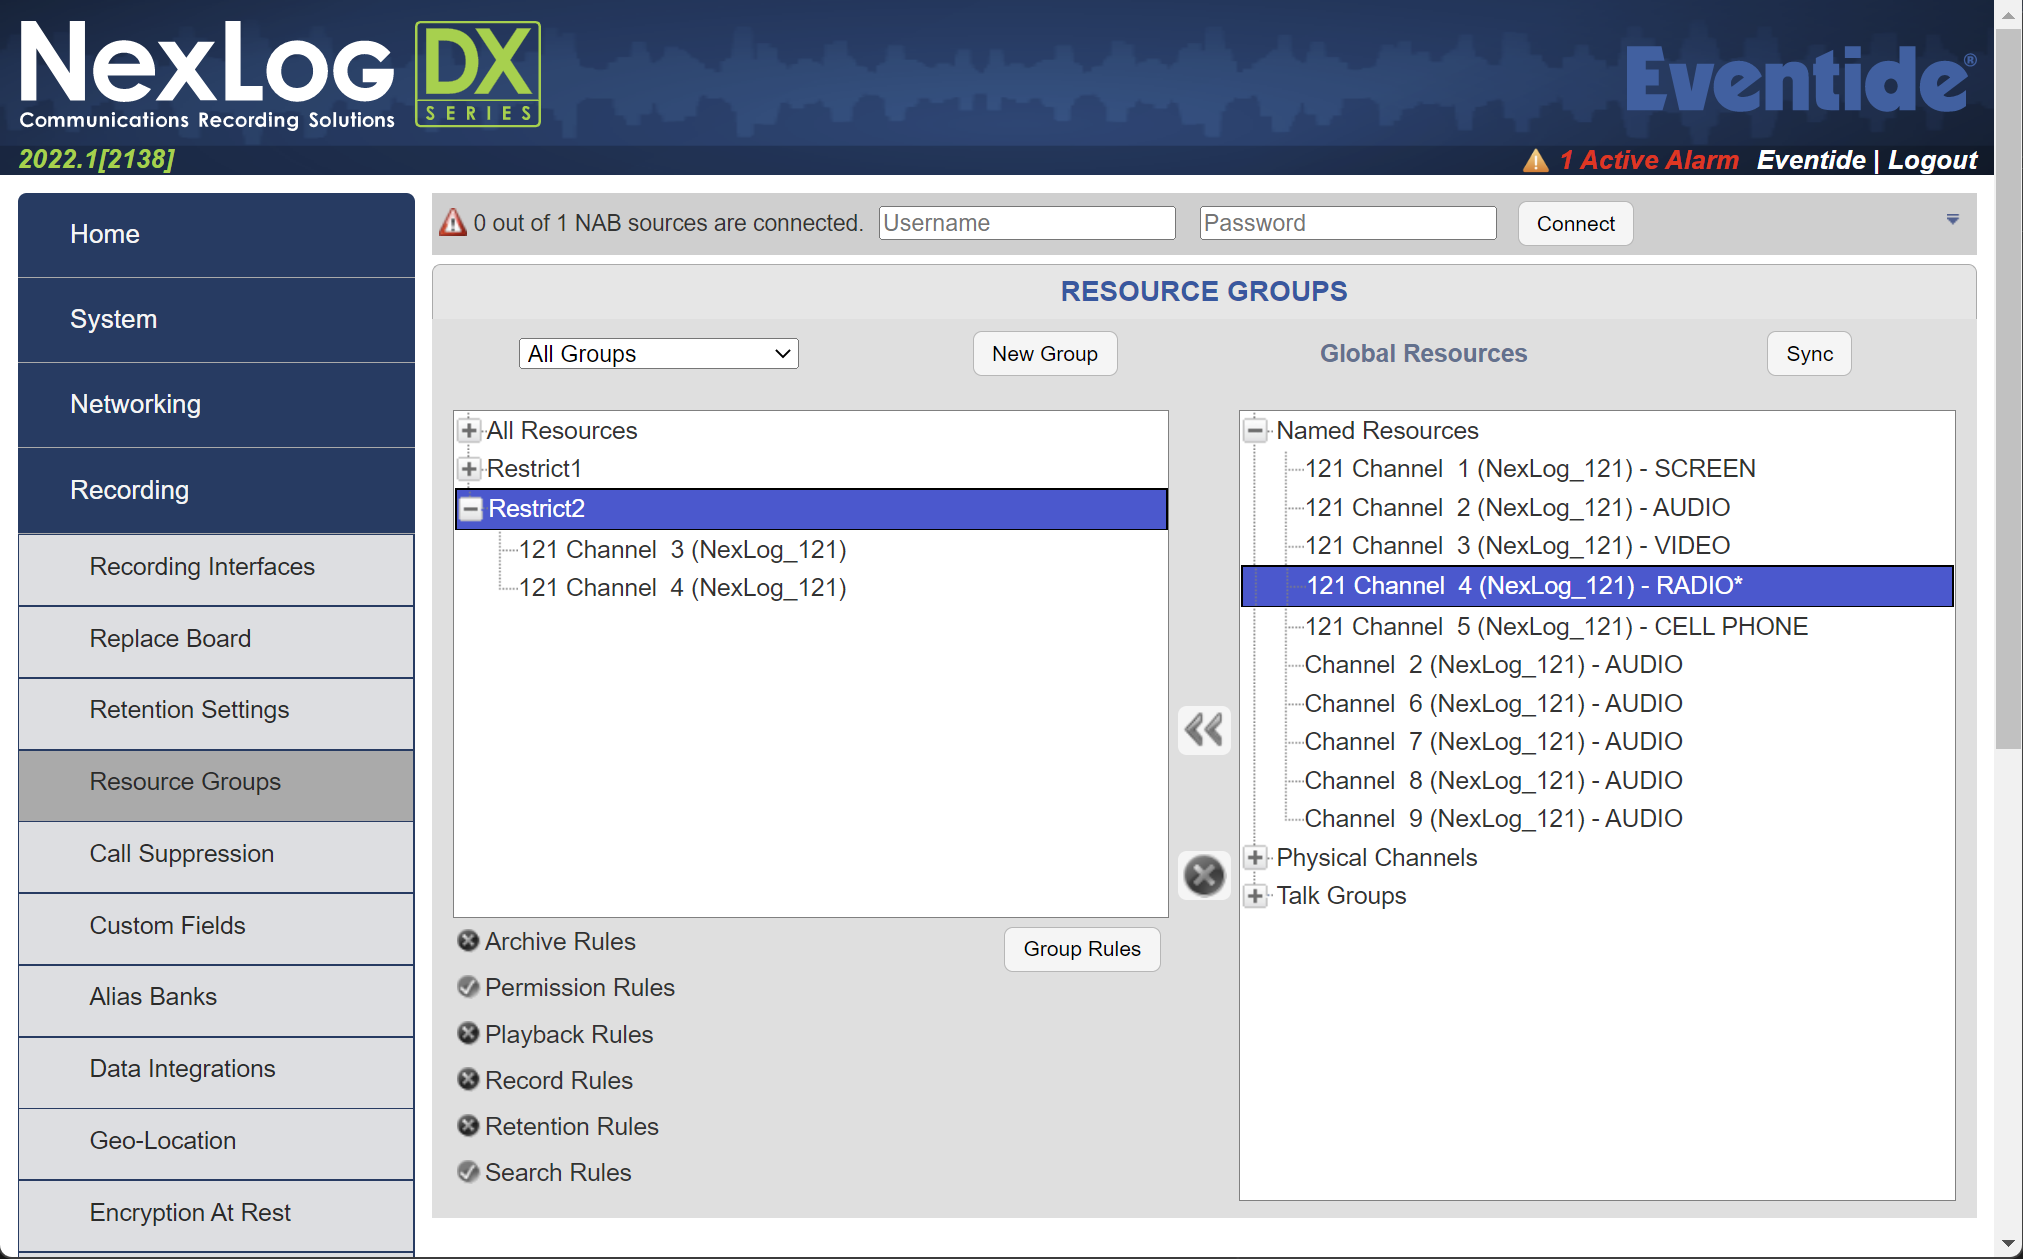
Fig. 7.106 Create Resource Group
Once created, edit “Group Rules” and ensure that “Permission Rules” and the specified user(s) are selected.
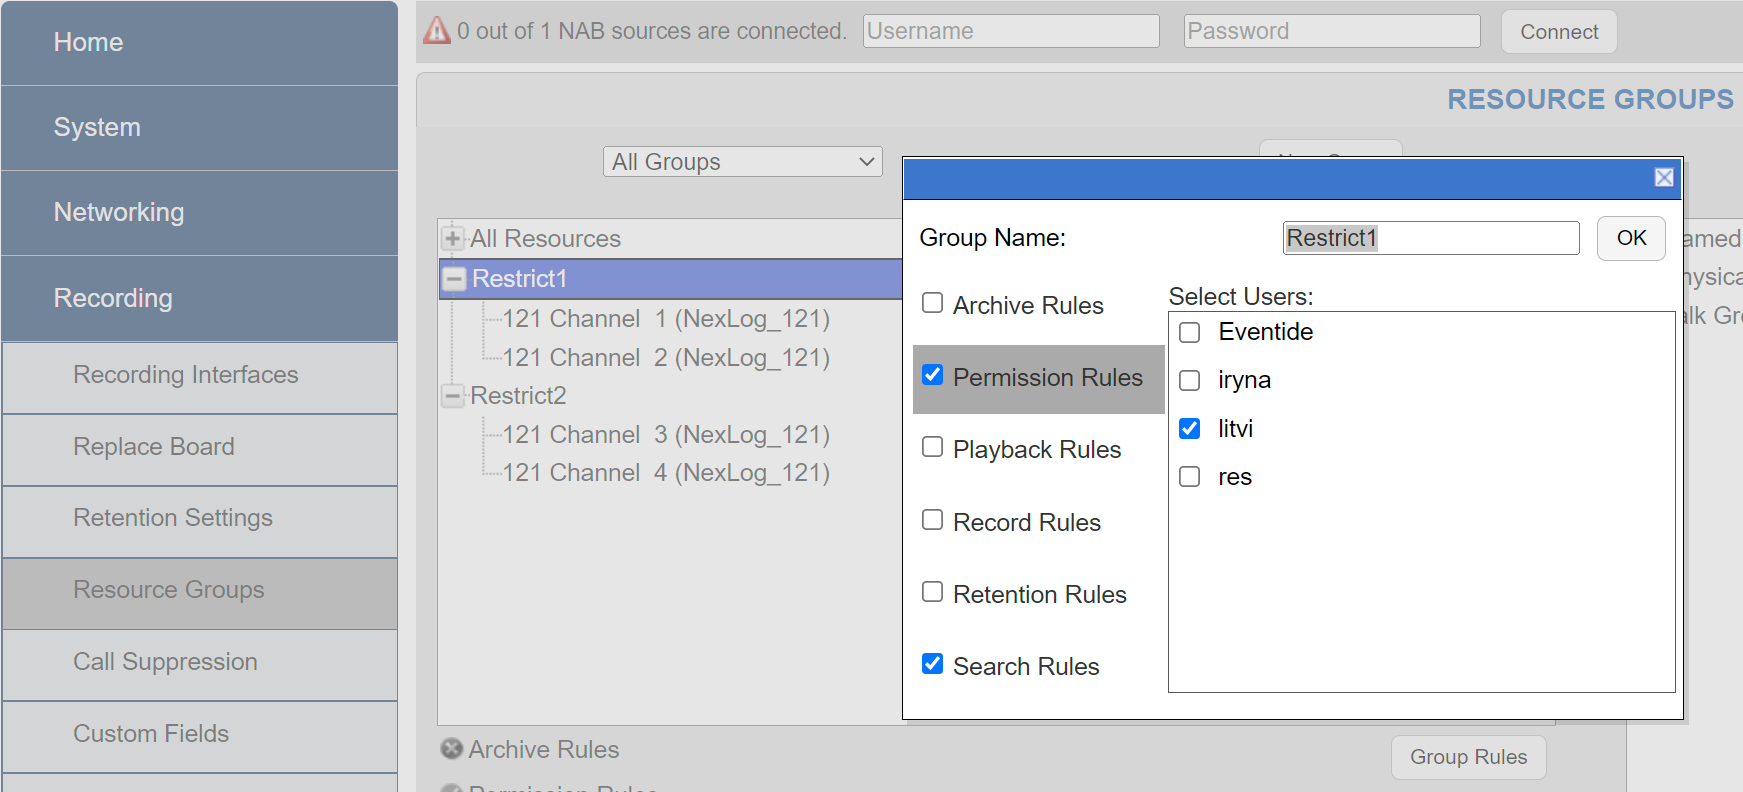
Fig. 7.107 Create Group Rules
Under the “Users” section, choose the intended user and select “Edit User”, then go to the “Permissions” Tab and select the appropriate resource group from the “From within Group” dropdown.

Fig. 7.108 From Within Group
When the user logs into MediaWorks DX, they’ll now have access to the specified Resource Group.
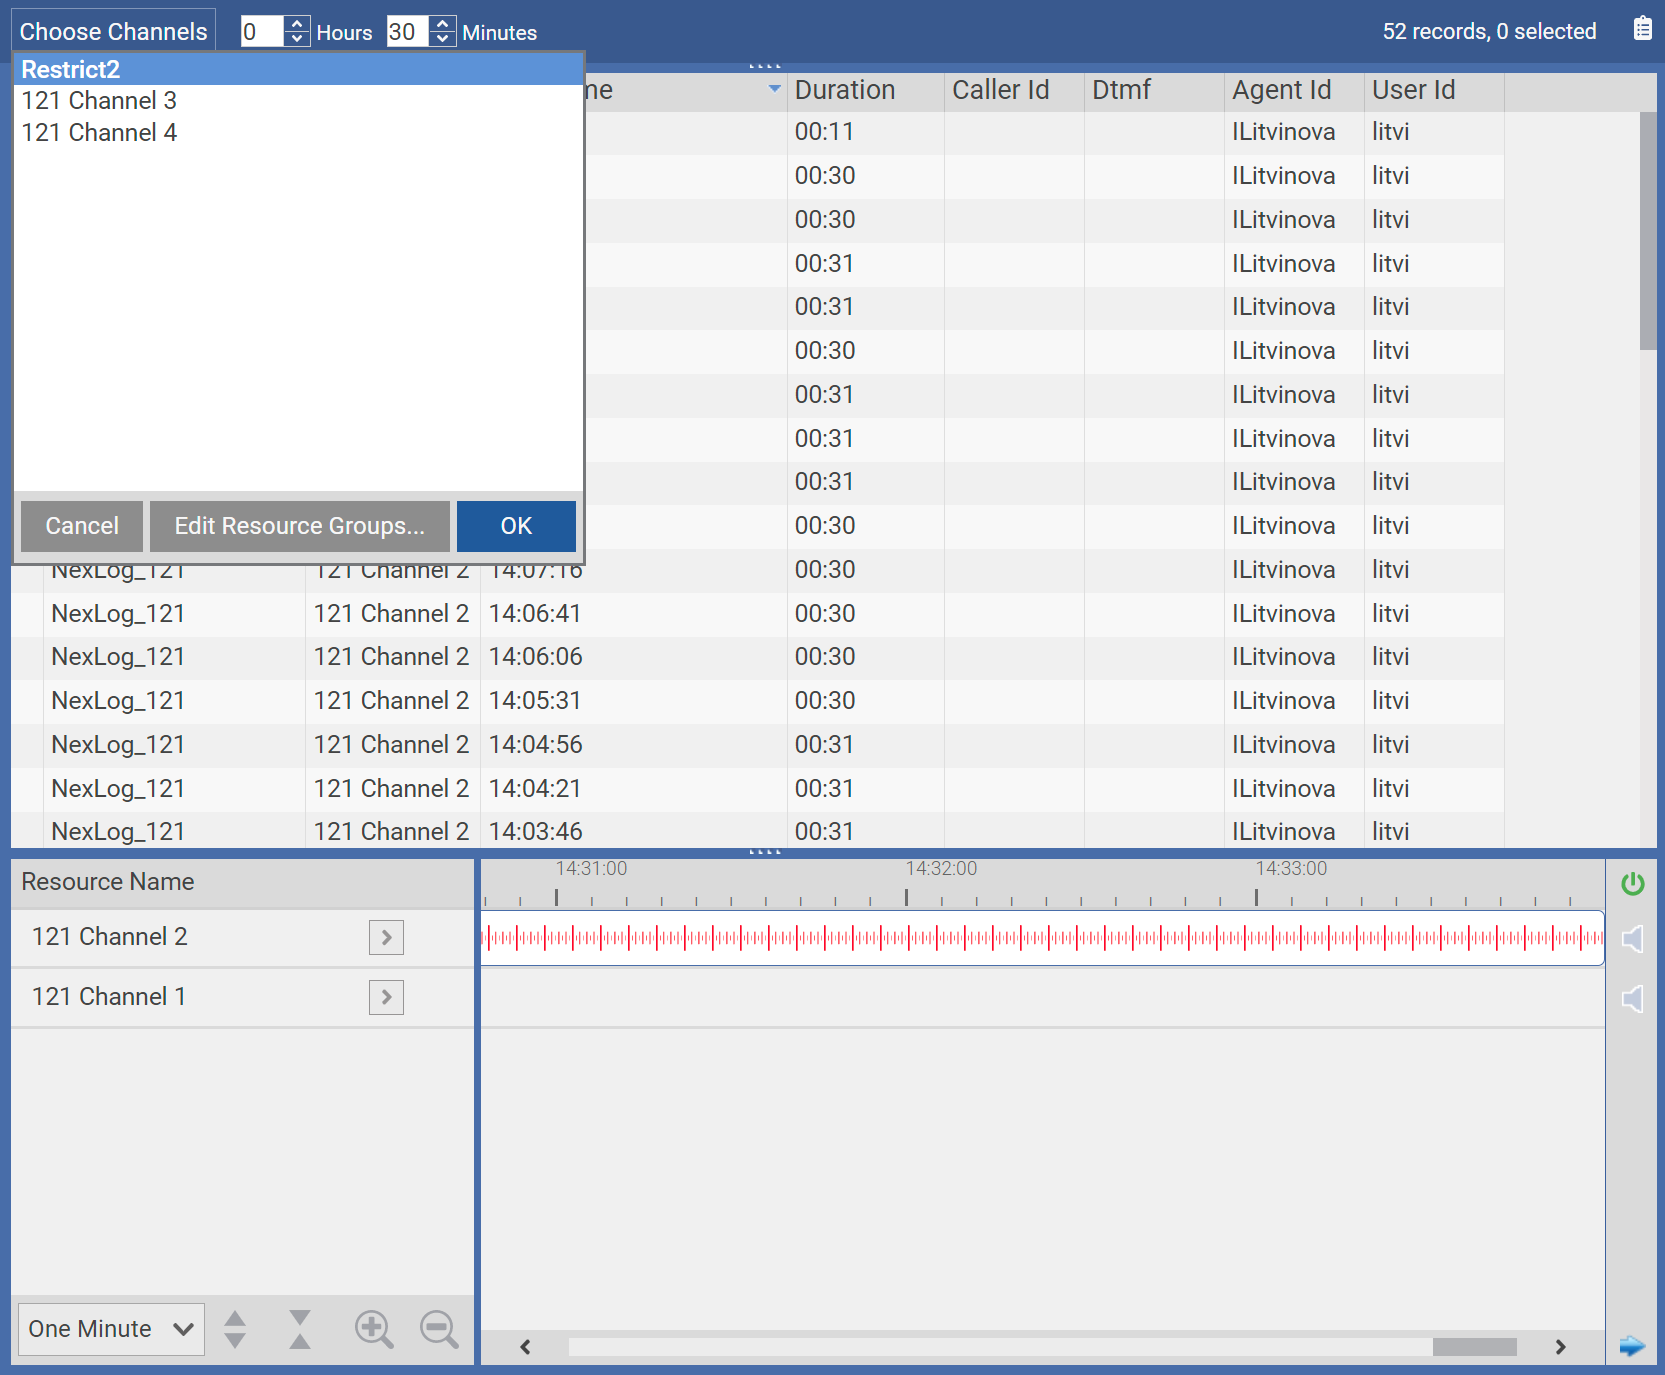
Fig. 7.109 From Within Group in MediaWorks DX
- Enable alarm notifications via email
If this checkbox is selected, the user will receive any email alerts or alarm notifications that are configured to do so in the “Alert Codes” section. This setting is enabled and cannot be disabled if the “Admin” permission is applied to the user. To receive the notifications via email, a valid email address must be configured in the “User Info” tab. The SMTP server settings must also be enabled and defined on the page (Section 7.7.5 Email).
- NAB Access
If this system is configured with any NexLog Access Bridges, each NAB will be listed here by IP and Serial Number. By default, users will have access to all configured NABs. You can uncheck these boxes to restrict a user from connecting to any given NAB. By unchecking the box, you are removing permission to access the source recorder and if this user is a member of a group with access, it will not override the block. Similarly, a User Group with a NAB unchecked will block access to that NAB for all users in that group.
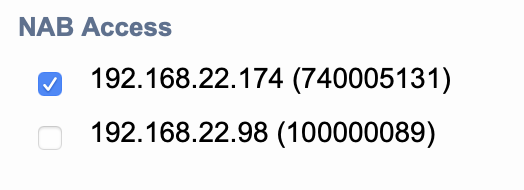
Fig. 7.110 NAB Access Denied by Group Membership
For example, above we see the NAB Access section of a User who is in a group that only has access to 192.168.22.184, and as such is blocked from access to 192.168.22.98.
7.6.1.1.3. Account Settings
- Can Change Password
If checked, the user can change their own password. If disabled, only Admins can change this user’s password.
- Require Two Factor Authentication
If checked, the account will be be enrolled in Two Factor Authentication on the next login. Disabling this option will remove the secret and unenroll the user. Re-enabling this option will generate a new secret for the user and start enrollment again.
- Account Enabled
If checked, the account can be used. If unchecked, the account cannot be logged into.
- Password Never Expires
If checked, the password expiry date has no effect.
- Account Expiry Date
The account expiry date. After this date, user will not be able to log in. They will get an “Account expired” message instead.
- Number of days after a password expires until the account is permanently disabled
If password complexity rules include expiring passwords, this is the number of days after a password is unchanged that the account will be permanently disabled. If configured, this will prevent long-dormant accounts from being logged into again.
- Session Inactivity Timeout Enabled
By default, users will be logged out from Configuration Manager and MediaWorks DX after an hour of inactivity. This toggles whether that is in effect.
- Session Inactivity Timeout (mins)
Number of minutes of inactivity before the user is automatically logged out. If the Session Inactivity Timeout is not enabled, this value is ignored. The default is 60 minutes.
7.6.1.1.4. User Resource Permissions
These settings control what resources a user can search and playback in MediaWorks DX and the Front Panel. This feature integrates with the Resource Groups feature detailed in Section 7.3.4 Resource Groups of this manual. You can add or delete individual resources or resource groups from the user’s resource groups here.
7.6.1.1.5. User Search Filters
These settings control resource groups in MediaWorks DX, MediaAgent DX, and Enhanced Reporting. This feature integrates with the Resource Groups feature detailed in Section 7.3.4 Resource Groups. You can add or delete individual resources or resource groups from the user’s resource groups here.
7.6.1.2. Delete User
Delete User will delete the selected users from this recorder and any recorders currently connected via NexLog Access Bridge. Clicking this button will prompt for confirmation before deleting.
7.6.1.3. Change Password
Change Password will change the current password for the selected accounts.
7.6.1.4. Permissions
The Permissions button will load the Permissions page showing the selected user’s permissions. See Section 7.6.1.4 Permissions for more details.
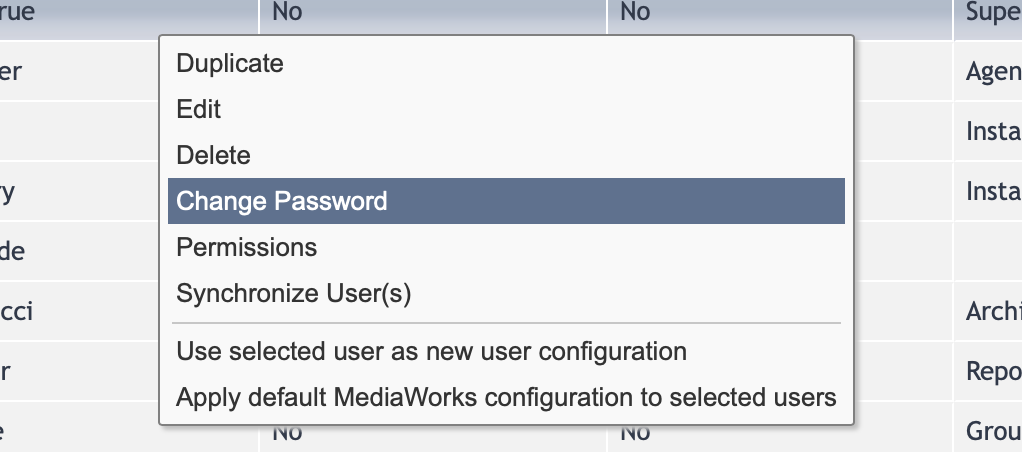
Fig. 7.111 User Table Right-Click Context Menu
7.6.1.5. User Table Right-Click Context Menu
There are additional features available on this page accessible by right-clicking on the user table: Duplicate, Synchronize User(s), Use Selected User as New User Configuration, and Apply Default MediaWorks Configuration to Selected Users.
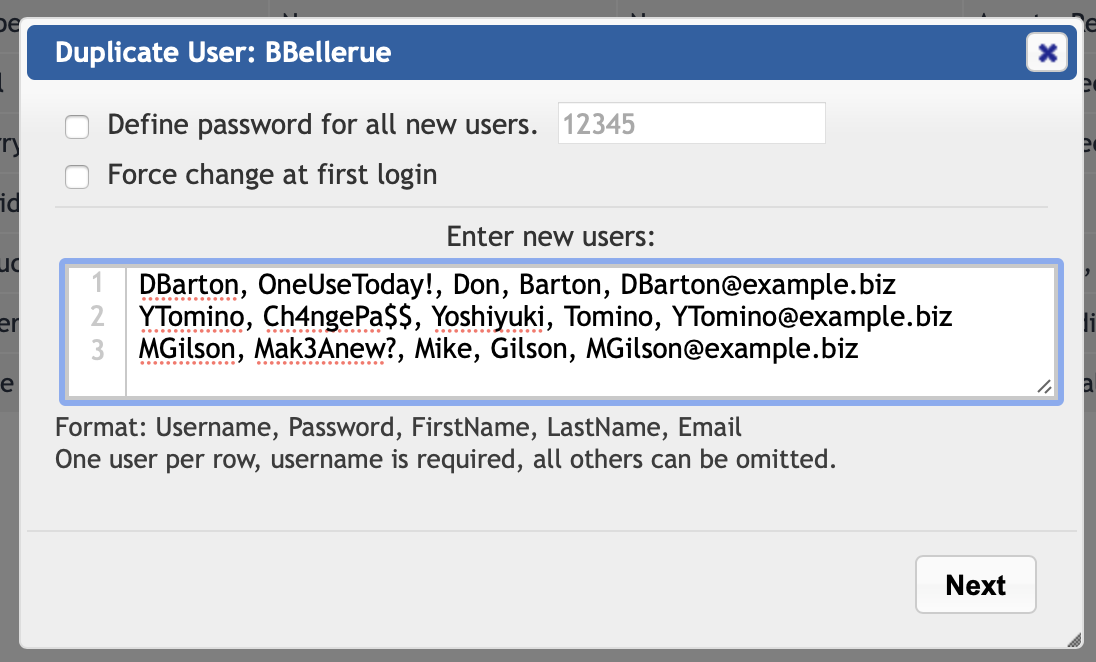
Fig. 7.112 Duplicate User
7.6.1.5.1. Duplicate
This option adds new users based on the selected user, with all the same options, user group memberships, permissions, resources and search filters. The users are added one per line with Username, Password, FirstName, LastName and Email as a comma delimited list. The only required entry is a Username.
The checkbox for “Define Password for all new users.” will let you assign a specific password to each user, who can then change it individually when they log in. If “Force change at first login” is selected, these users will be prompted to change password at first login.
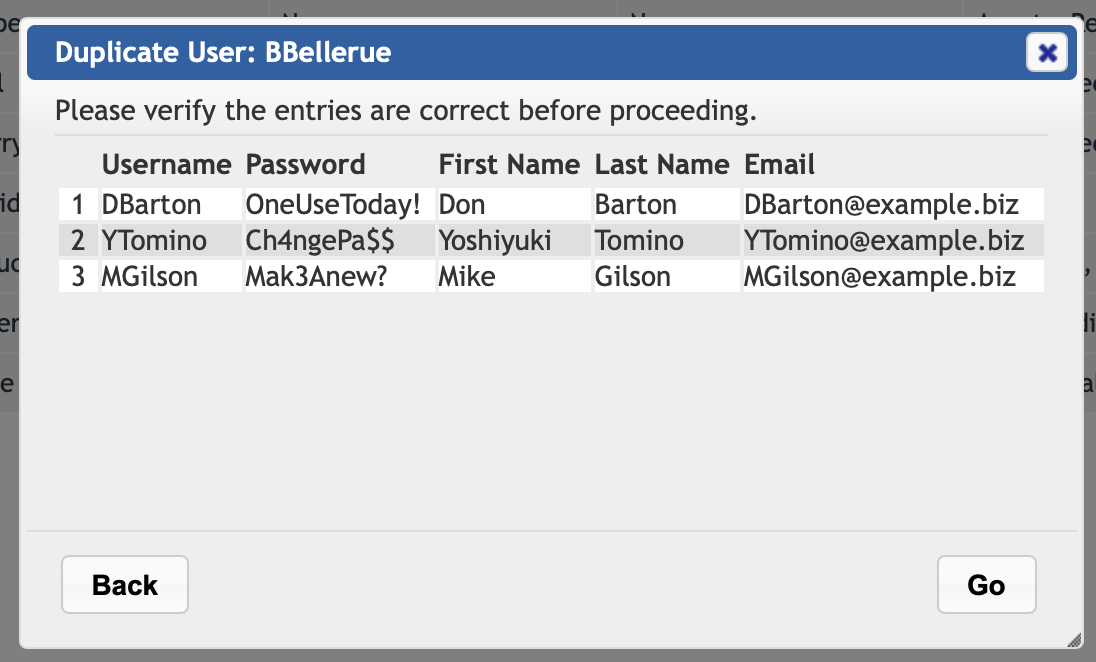
Fig. 7.113 Verify Duplicate User
After clicking Next, the user info will be presented for verification before being duplicated. Click “Back” to make corrections; click “Go” to create these users.
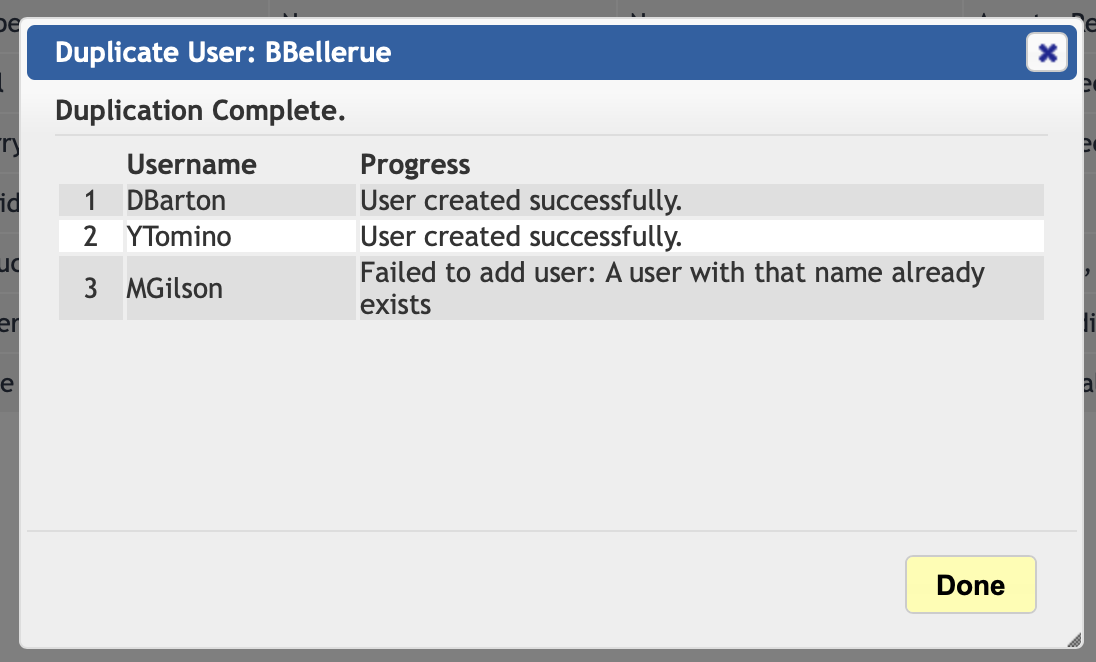
Fig. 7.114 Duplicate User Results, with Error for User That Already Exists
7.6.1.5.2. Synchronize User(s)
Synchronize User(s) will sync the selected user to all NAB sources currently connected. (This option is only present for systems with NexLog Access Bridge.)
7.6.1.5.3. Use Selected User as New User Configuration
If you want to set up a custom MediaWorks DX user configuration (tab layout and options), you can set up that configuration with any user and then use this option to make it the default for all new users.
7.6.1.5.4. Apply default MediaWorks Configuration
This will apply the current “New User Configuration” to the selected users.
7.6.1.6. NexLog Access Bridge Sync
If the recorder is licensed and configured as a NexLog Access Bridge host, the NAB Connection Manager tool will appear at the top of the user page. Enter an admin username and password here to connect to all configured NAB sources.
While connected via NAB, all users created, edited and deleted will be created, edited and deleted across all sources as well as the host.